SETNEXT Ultron - Settings & User Portel
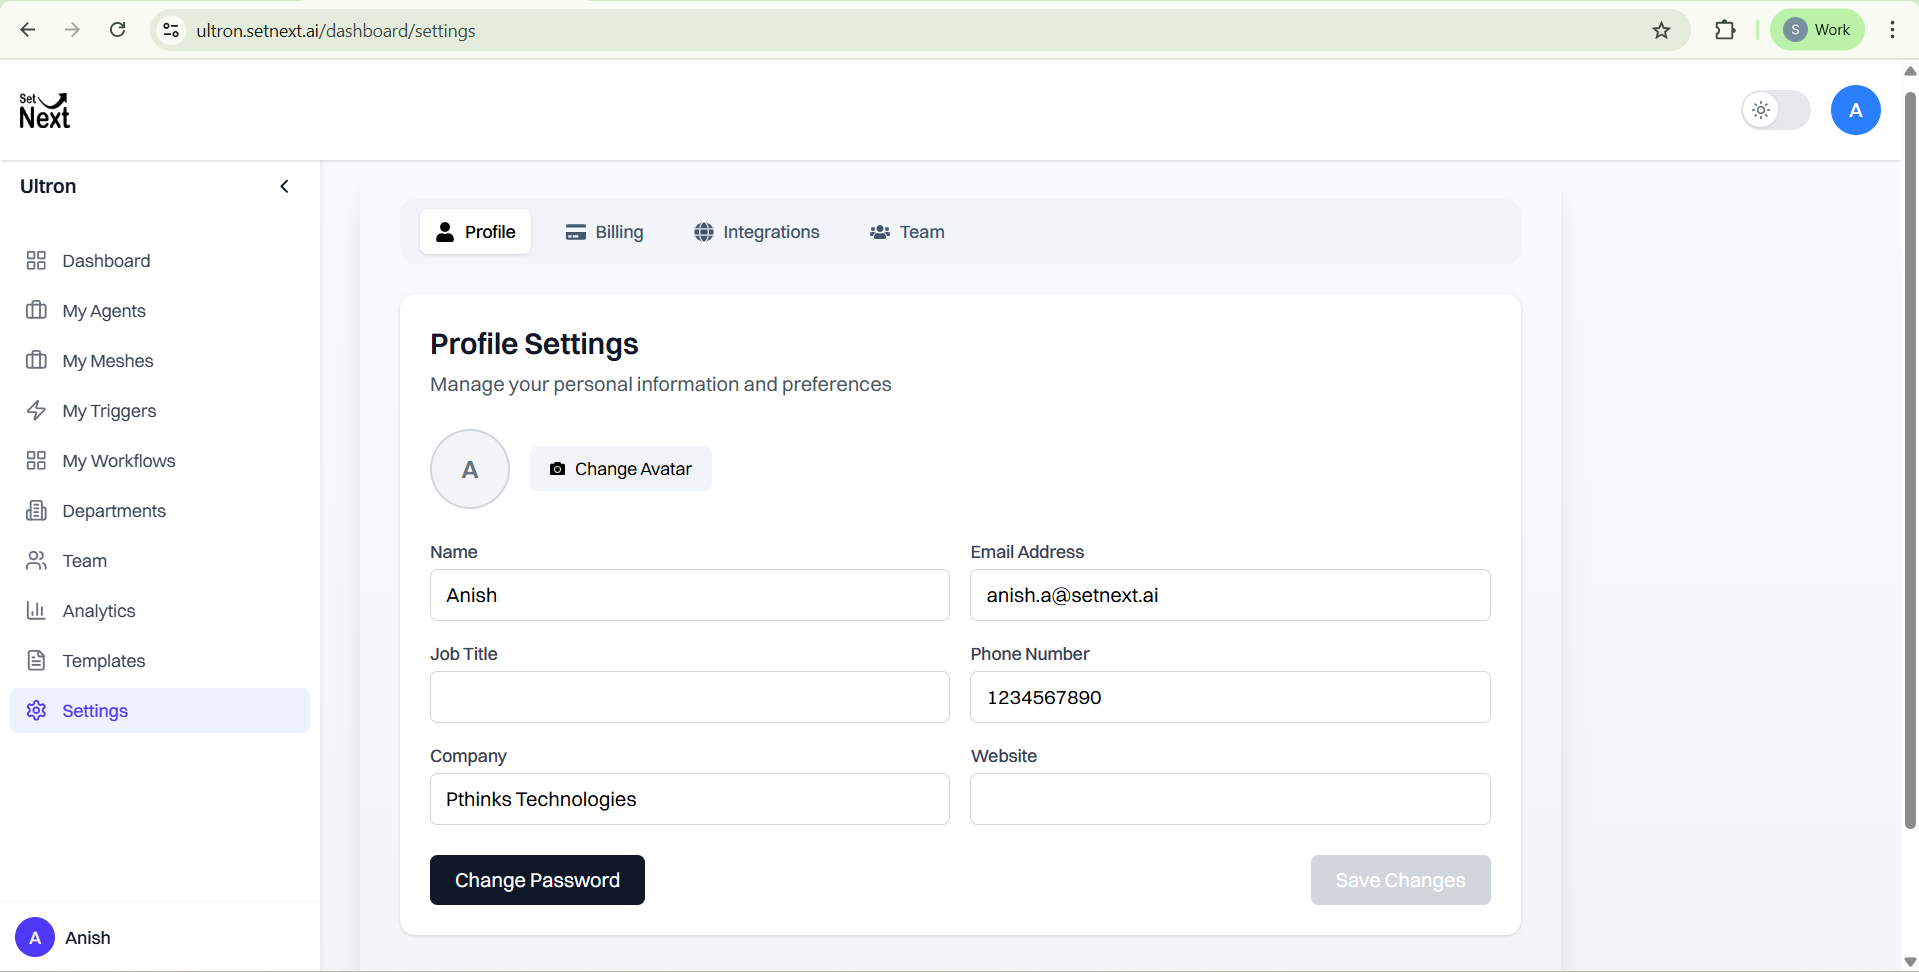
The Profile Settings page allows a user to manage personal information and preferences within the SetNext platform.
📄 What You Can Do Here
This page provides fields and actions to update:
- 👤 Name
- 🧑💼 Job Title
- 🏢 Company Name
- 📧 Email Address
- 📞 Phone Number
- 🌐 Website
Each of these fields can be edited manually by the user and saved using the Save Changes button.
🔐 Change Password
There is a Change Password button available for updating login credentials securely.
Clicking this will open a modal or form to:
- Enter current password
- Enter new password
- Confirm new password
🖼️ Avatar Upload
You can also upload or change your profile picture by clicking the Change Avatar button.
This helps personalize your profile and improve collaboration across teams.
📌 Tabs in Settings
At the top of the page, there are 4 tabs:
- Profile – Current tab for personal details
- Billing – Manage subscriptions and invoices
- Integrations – Connect Tools services (each and every tools)
- Team – Manage team members and roles
📝 Example Details
Name: (your name)
Email: (your email)
Company: (your Company name)
Phone Number: (your phone number)
👥 Organization Team Management – SetNext Ultron
SetNext provides a structured way to manage your organization’s users, groups, and automation using departments, user groups, roles, users, and AI agents.
🧭 Team Management Structure
The overall structure flows like this:
- Create a Department
- Inside the department, create User Groups
- Assign Roles to each User Group
- Add Users to the User Groups
- Assign AI Agents to the User Groups
🏢 1. Departments
Departments represent broad functional areas of your organization like:
- Engineering
- Human Resources
- IT Support
- Finance
- Sales & Marketing
Creating departments helps you keep your organization clean, organized, and easy to manage.
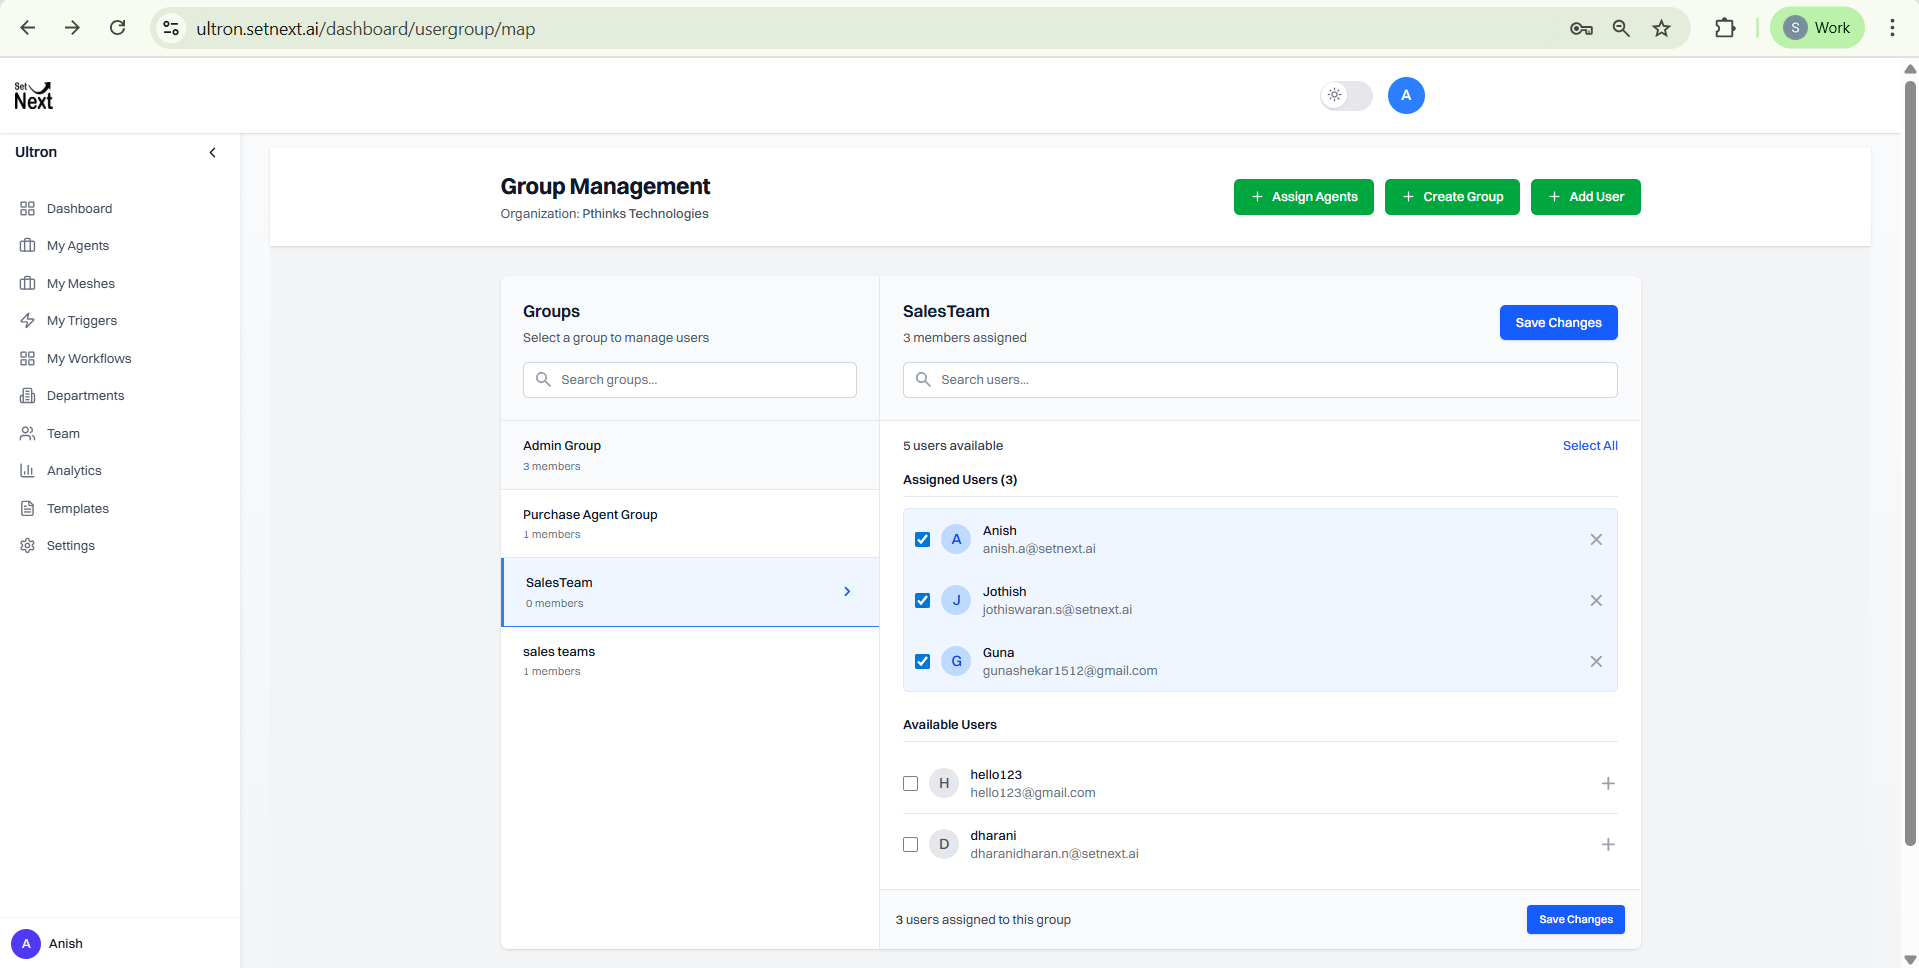
👥 2. User Groups
Inside each department, you can create User Groups.
User Groups represent smaller, more focused teams such as:
- Recruitment Team (inside HR)
- Backend Team (inside Engineering)
- Sales Team (inside Sales & Marketing)
They help divide work and manage user permissions more effectively.
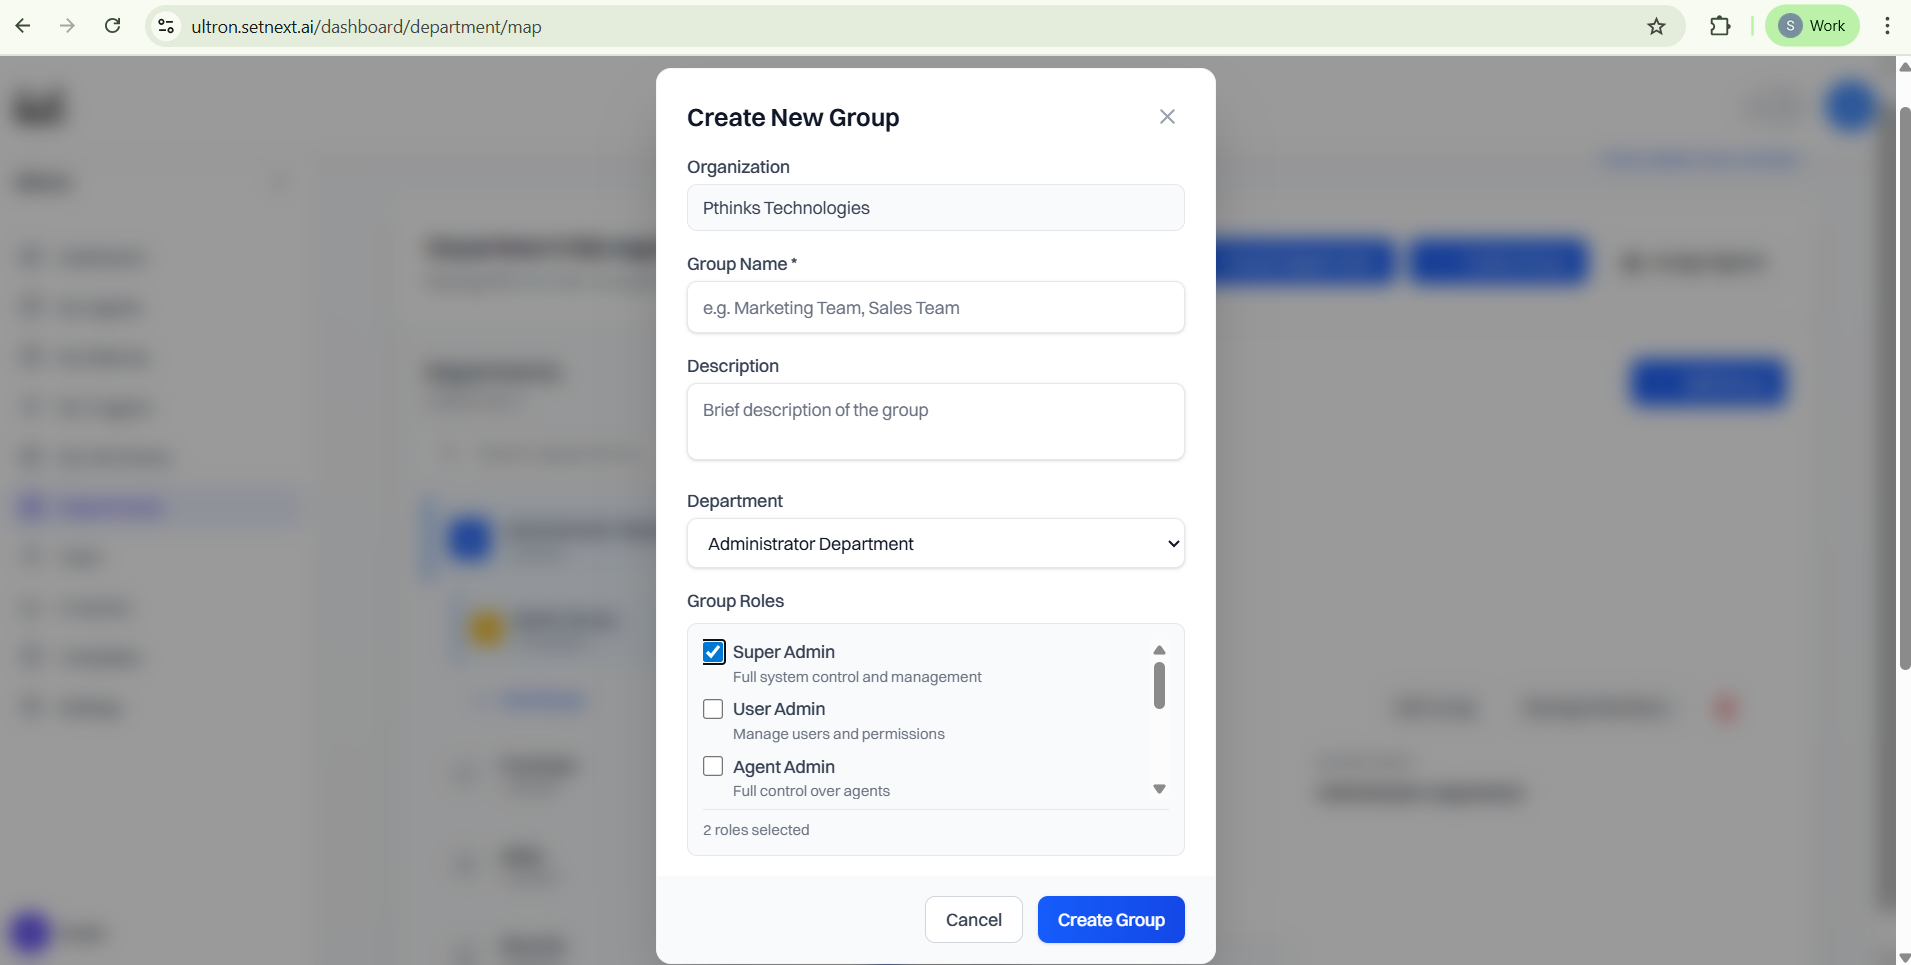
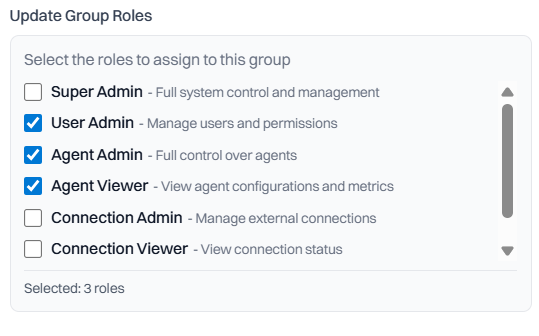
🛡️ 3. Assigning Roles to User Groups
Each user group can be assigned a role to define what users in the group are allowed to do.
Here are the available roles:
• Super Admin
Gives complete access to all parts of the platform including billing, users, workflows, and settings.
• Agent Admin
Can create, edit, and manage AI agents. This includes assigning agents to groups.
• Credential Admin
Manages credentials, secrets, API keys, and integrations needed for agents to work.
• Agent Viewer
Has read-only access. Can view agent workflows and logs but cannot make changes.
• User Admin
Can invite, update, or remove users from the organization and assign them to groups.
🎯 Roles ensure users only have access to what they need.
👤 4. Adding Users to Groups
Once a user group is created and a role is assigned, you can add users to that group.
- Users will inherit the permissions defined by the group’s role.
- You can search users by name, email, department, or group.
- Admins can easily edit user details or move them to other groups if needed.
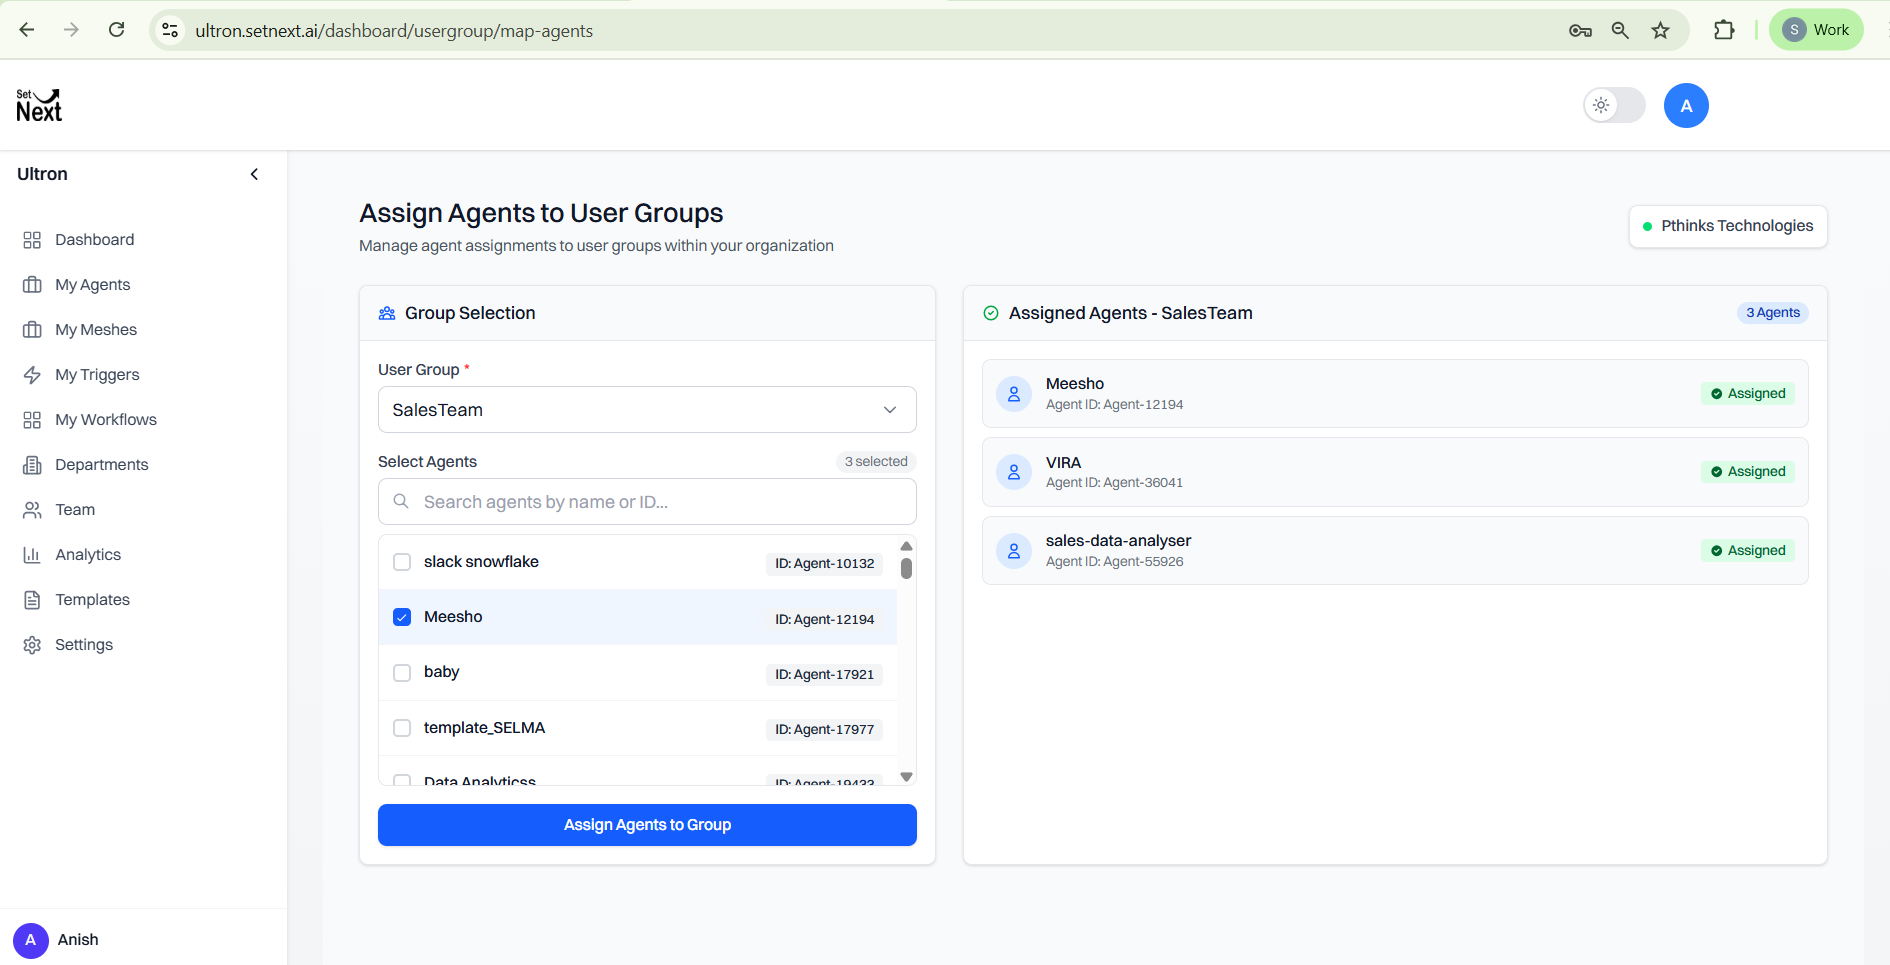
🤖 5. Assigning AI Agents
After setting up users and roles, you can assign AI agents to a user group.
Agents are used to:
- Automate repetitive tasks
- Run workflows
- Send reports or alerts
- Fetch data using APIs
Each agent will operate within the boundaries of the group it’s assigned to.
✅ Why This Structure Works
Using this flow — from departments to groups, to roles, users, and agents — helps:
- Keep your workspace clean and organized
- Improve security by limiting access through roles
- Enable better automation and collaboration
- Scale with your team as it grows
💡 This structure makes it easy for admins to manage everything from one dashboard.